The D'Lite is a bit more forgiving when it comes to build order, but I still prefer the method that Brandon listed.
Building an Amp Order of the assembly steps
Moderators: pompeiisneaks, Colossal
Re: Building an Amp Order of the assembly steps
Funkalicous, where were you when I did my 100watt HRM? You would have saved me a good 40 hours in thinking! 
The D'Lite is a bit more forgiving when it comes to build order, but I still prefer the method that Brandon listed.
The D'Lite is a bit more forgiving when it comes to build order, but I still prefer the method that Brandon listed.
-
Funkalicousgroove

- Posts: 2235
- Joined: Mon Jul 25, 2005 8:04 pm
- Location: Denver, CO
- Contact:
Re: Building an Amp Order of the assembly steps
You have my # 
Owner/Solder Jockey Bludotone Amp Works
-
Funkalicousgroove
- Posts: 2235
- Joined: Mon Jul 25, 2005 8:04 pm
- Location: Denver, CO
- Contact:
Re: Building an Amp Order of the assembly steps
double post-sorry
Owner/Solder Jockey Bludotone Amp Works
Re: Building an Amp Order of the assembly steps
I wish I had read this thread before I was 3/4 done.
Those transformers are heavy!
How about a sticky for the next guy?
Those transformers are heavy!
How about a sticky for the next guy?

Re: Building an Amp Order of the assembly steps
Good advice that I always like to follow as well.Fischerman wrote:One thing I took extra care/time to do in my build (which is in a Weber Bandmaster Reverb chassis) was make sure no screws/nuts were obscured by anything. Every component in my amp can be removed without having to get under anything else to get at screws/etc. I could pull either tranny...the choke...any circuit board without even having to loosen anything else.If you install the transformers first how do you get the screws in that are under the transformers?
So as the Murray says in Caddyshack..."so I got that going for me." (I think it was Murray's line).
When I start a build I like to fit every single part on the chassis and make sure all the parts fit, line up, look good. Once that is done I remove the iron though. No way I'm maneuvering 100W iron while I build an amp. I iron comes near the end. Gotta make sure it's easy to install, no mounting holes outsourced.
Re: Building an Amp Order of the assembly steps
Great pointers one and all!
If the first timer doesn't all ready have one, I suggest as a first step to build an amp cradle.
It really helps working on a chassis.
Maybe not at first since you are flipping that box around a lot but for wiring and working on a built amp they are indispensable.
I think I copied AmpDoc's cradle when I built mine but later had some other ideas.
The locking arms are great so you can have the chassis at any angle you wish.
And since the chassis is really an unbalanced load due to the transformers having the cradle hold the chassis securely is key.
You do not have the required permissions to view the files attached to this post.
Tom
Don't let that smoke out!
Don't let that smoke out!
-
Guitarman18
- Posts: 454
- Joined: Tue Sep 04, 2007 9:32 pm
- Location: UK
Re: Building an Amp Order of the assembly steps
Thanks for posting that Tom. That's a nice looking cradle!
I never knew that the material it is made of, has an effect on tone, thankfully I didn't make mine out of MDF!
Could this be something to do with electrons being able to survive in a free space vacuum? So, wood with loose grain structure would be better than MDF, where there are no spaces for the 'fragile harmonics' to hang out.
Cheers,
Paul.

Re: Building an Amp Order of the assembly steps
A single row wooden CD rack works pretty well too. For the guys who are just doing one amp or love the low budget thing here's an alternate way to do a stand. Disclaimer: I have no affiliation with Folger's or any of it's sister companies although I do tend to overuse their product.
You do not have the required permissions to view the files attached to this post.
Former owner of Music Mechanix
www.RedPlateAmps.com
www.RedPlateAmps.com
-
bluesfendermanblues
- Posts: 1314
- Joined: Tue May 22, 2007 12:57 pm
- Location: Dumble City, Europe
Re: Building an Amp Order of the assembly steps
Heisthl, what amp type is that??
Re: Building an Amp Order of the assembly steps
That is a Carr Slant 6V
Wife: How many amps do you need?
Me: Just one more...
Me: Just one more...

Re: Building an Amp Order of the assembly steps
I've been wanting a nice cradle for a while now. I don't build a lot of amps but I do work on quite a few... I've been using the "stack whatever's handy" method. Been thinking of "up-grading" to the Folger's stand but my wife only buys coffee in those fancy foil vacuum bags...
Last night I Googled "amp cradle" and found a nice kit from Trinity Amps for $75.00 (plus shipping). I just might have to buy myself a Christmas present.
Last night I Googled "amp cradle" and found a nice kit from Trinity Amps for $75.00 (plus shipping). I just might have to buy myself a Christmas present.
Deric®

 768]
768]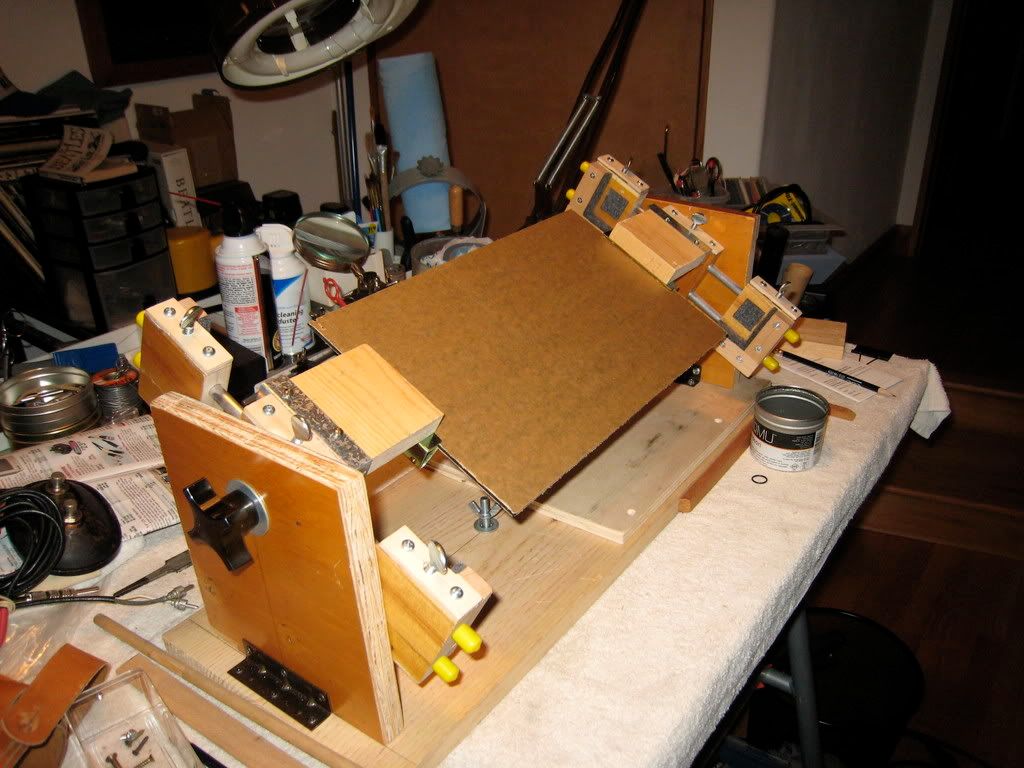
Re: Building an Amp Order of the assembly steps
That looks real versitile Ange.
The one I built is similar to the plans I posted but instead of the locking arms I used a lazy susan on each end because I had seen somebody else make one like that.
I bought some poplar wood and kind of designed it as I went along because I didn't have those plans when I built mine.
I think I spent about $65 to build it which surprised me.
So buying a built one for $75 isn't bad at all.
Well, the amp wanted to flip over due to the unequal weight distribution of the transformers.
So on mine I drilled some holes that I stick long screws in to lock the arms so the chassis is either laying flat or at a 45 degree angle towards me.
The other thing that is easy to get wrong is the length of the arms the chassis sits on.
You want the amp to sit a bit back on them or it will want to flip forward.
Works great but if I was to build a second one I would build it like those plans I posted.
Tom
Don't let that smoke out!
Don't let that smoke out!
Re: Building an Amp Order of the assembly steps
Color me stupid but I don't see the purpose of the tilt feature. Here's my main stand that cost me 6$ at a thrift store. It started life as a CD rack, took 5 minutes to modify and easily accommodates any size chassis.
You do not have the required permissions to view the files attached to this post.
Former owner of Music Mechanix
www.RedPlateAmps.com
www.RedPlateAmps.com
Re: Building an Amp Order of the assembly steps
Well I like the tilt feature because I can sit in a chair and work on the amp easily.
If you are standing at a bench or sitting on a high stool then you may like the chassis resting flat.
Whatever works best for you is the best deal.
But I do like the thriftiness Henry!
If you are standing at a bench or sitting on a high stool then you may like the chassis resting flat.
Whatever works best for you is the best deal.
But I do like the thriftiness Henry!
Tom
Don't let that smoke out!
Don't let that smoke out!