Hey all,
I've got birch ply on order and am excitedly drawing up plans for what
will eventually become my first scratch-built amp, a rocket 2x12 combo!
My first issue is how to fasten the joints. I'm leaning towards a reinforced butt joint, but I'm also open to finger joints. Anybody have success with finger jointing using home equipment?
My other main issue is choosing speakers. I haven't much experience with high-end speakers, just the good old G12T-75's in my Marshall cab. Considerations include Golds, Blues, and the Greenback / V30 pair.
I'm open to opinions and suggestions about these.
Also, a local shop tech mentioned that eminence speakers have a great cost / performance ratio...
2x12 Cabinet Build: Joinery and speaker choice
Moderators: pompeiisneaks, Colossal
-
MysteryFever
- Posts: 37
- Joined: Wed Mar 30, 2011 4:10 am
- Location: Maine, USA

Re: 2x12 Cabinet Build: Joinery and speaker choice
I've done enclosures at home with just a router jig.
Half blind dovetails, and box joints.
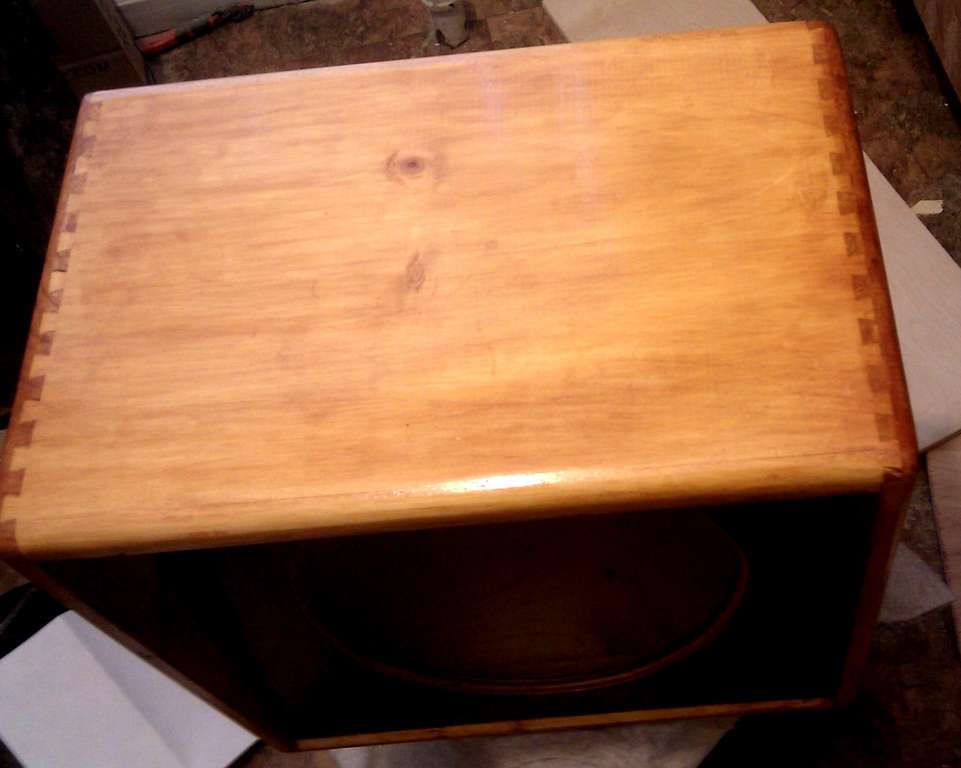
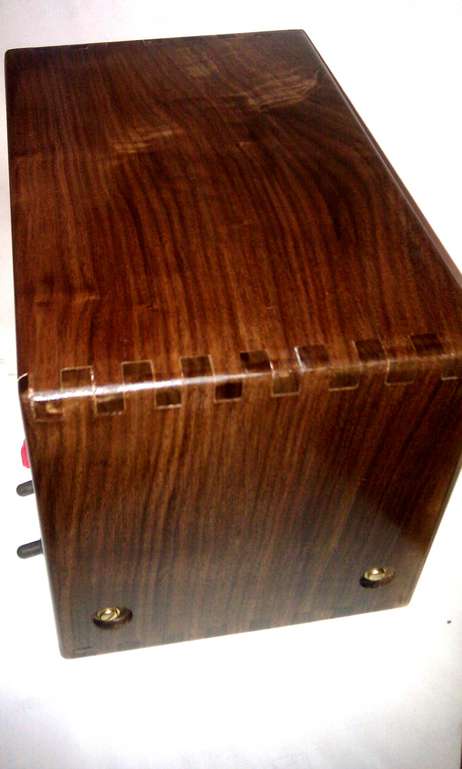
If you want to wrap the grain around the piece like I do, be sure to mark the sides as you cut them, and note inside or outside surface. This is a single 12 cab, and 2 shots of a head cab I built.
[img:961:768]http://www.vehicross.info/gallery/data/3272/48.jpg[/img]
[img:462:769]http://www.vehicross.info/gallery/data/3272/Head5.jpg[/img]
[img:575:767]http://www.vehicross.info/gallery/data/3272/Head8.jpg[/img]
The finger joint is more forgiving, you can cut them a little long, then trim after glue hardens.
This guy is a Wood Ninja. Click on any of his pics for some really shweet joinery.
http://www.eurus.dti.ne.jp/~k-yazawa/jointwork.html
John
Half blind dovetails, and box joints.
If you want to wrap the grain around the piece like I do, be sure to mark the sides as you cut them, and note inside or outside surface. This is a single 12 cab, and 2 shots of a head cab I built.
[img:961:768]http://www.vehicross.info/gallery/data/3272/48.jpg[/img]
[img:462:769]http://www.vehicross.info/gallery/data/3272/Head5.jpg[/img]
[img:575:767]http://www.vehicross.info/gallery/data/3272/Head8.jpg[/img]
The finger joint is more forgiving, you can cut them a little long, then trim after glue hardens.
This guy is a Wood Ninja. Click on any of his pics for some really shweet joinery.
http://www.eurus.dti.ne.jp/~k-yazawa/jointwork.html
John
-
Lonely Raven

- Posts: 878
- Joined: Fri Nov 16, 2007 4:09 am
- Location: Bolingbrook, IL
- Contact:
Re: 2x12 Cabinet Build: Joinery and speaker choice
Wow, those "letter shaped tenons" are out of this world! Thanks for sharing that link!
Jack of all Trades,
Master of None
Master of None
-
MysteryFever
- Posts: 37
- Joined: Wed Mar 30, 2011 4:10 am
- Location: Maine, USA
Re: 2x12 Cabinet Build: Joinery and speaker choice
Very nice looking cabinets you've made! That's encouraging to see done with a router jig.

Re: 2x12 Cabinet Build: Joinery and speaker choice
Here's a link to a quick demo of how to make a jig to do finger joints. Click on all 5 steps of each demo. This is what I did and it worked very well. Use clamps and take your time. The quality of table saw and dado blade set will be the determining factor to the level of precision you'll get. But, even with my sub-par setup I was able get nice snug joints.
As mentioned if you make the joints slightly longer, then sand flush afterwards it helps until you get the hang of the procedure. The more I did the better I got at getting it right. A file was handy for the few joints that were not perfect.
http://www.finewoodworking.com/interact ... -tablesaw/
As mentioned if you make the joints slightly longer, then sand flush afterwards it helps until you get the hang of the procedure. The more I did the better I got at getting it right. A file was handy for the few joints that were not perfect.
http://www.finewoodworking.com/interact ... -tablesaw/
Chris
Re: 2x12 Cabinet Build: Joinery and speaker choice
The letter shaped tenon and scissor jointwork are mindboggling. He must have a cnc to get that precision
Re: 2x12 Cabinet Build: Joinery and speaker choice
Don't settle for reinforced butt joints. You will never get the solid strength of the finger (or dovetail) joints. The link provided for making and using a fingerjoint jig is all you need to know. Practice on some scrap until you are confident that you are ready to risk the expensive baltic birch.
Some tips:
Think about your cuts carefully so that you get the orientation of the fingers correct. You don't want to end up with a "joint" that has fingers on the edge of both pieces. The easiest way to do this is to mark the pieces before hand showing the outside and front of the boards. On the long pieces start with a finger on the front edge. One the short pieces start with a gap and then a finger.
Until you gain confidence you can cut your pieces longer than the final dimension. Make the fingers on one end. If they don't meet your standards, simply cut them off and try again. When you have a good set you can cut the board to final length. You only get one crack at the last set
You should plan the width of the pieces to have a complete width at the end, avoiding ending up with a thin partial finger. This is not as trivial as it seems. Unless you make the cuts the exact thickness of the stock (and then you will find that you can't assemble the piece because it is too tight) the tiny extra width will add up over the number of cuts you make. One way to do this is to start with a piece that is wider than the final dimension, cut the fingers and then rip the pieces to the exact width of the last finger. Your final dimension for the cabinet may be a bit larger or smaller than you originally planned. We are talking very small differences here, but the details can make a piece look great or less than ideal.
The table saw jig technique also works well on a router table if you have one and if you can find a bit of the right thickness. When using solid stock (not plywood) you can surface plane the wood to the exact dimension of the router bit.